Required Setup
To complete this lab you need a Linux, Debian-based, x86-64 environment.
⚠️ You should not use any other environment (Windows/Mac): no support will be provided for these, and the differences in e.g. toolchains for these environments may lead to you being unable to complete the exercises and/or losing some/all of the marks.
In terms of Linux distribution we recommend Ubuntu 22.04 or Debian 12. To access such an environment you have several options:
Option 1: Lab Machines
The lab machines have x86-64 CPUs and an installation of the proper Linux distribution, and have most of the software required pre-installed. All the exercises for part 1 of the unit can be done on lab machines, however this option has the following downside:
- You need to be on campus i.e. you cannot make progress from home.
- You do not have administrator privileges: you will need to install a few tools manually for the exercises, but nothing that should require administrator privilege. Still, without administrator privileges the impossibility to disable ASLR will make some parts of the second lab (advanced stack smashing and advanced temporal safety) more difficult.
Option 2: Local x86-64 Virtual Machine
You can run a Linux distribution in a VM: the benefits of this approach are that you don't have to install Linux natively on your machine, and you can work at home. We provide a virtual disk image of a Debian 12 install that will be suitable for doing the exercises. To use it create a VM with e.g. Virtual Box and use the virtual disk provided as main storage media. You may need to fine-tune it (e.g. upgrade Virtual Box guest additions) after initialisation.
The VM should have at least 4 GB of RAM to complete the exercises.
It is an x86-64 image, so it will not work with native virtualisation tools on ARM-based MacBook laptops. For such recent MacBooks a solution seems to be UTM that emulates an x86-64 CPU. We have not tested it so if you try please consider reporting e.g. on the discussion boards about your success/failure.
comp60261-vm.qcow2for use with Linux Qemu/KVM hosts, as well as (hopefully) with UTM.comp60261-vm.vdifor use with VirtualBox. Create a new VM and specify a Debian OS and to use an existing disk. In the VM display settings also enable 3D acceleration. Upon first boot you may want to upgrade the VirtualBox guest additions.
The credentials to login in the VM are:
- username:
user - password:
a
Option 3: Local x86-64 Native Linux Install
If you have an x86-64 machine you can install Ubuntu 22.04 or Debian 12 natively. Select that option only if you know what you are doing: we will not provide support for the installation of Linux.
Option 4: Cloud VM (only if the other options are not possible)
If the lab machine/VM solutions are not suitable for you, as a last resort we can give you access to a cloud x86 VM. We have a limited number of resources for these, so make sure you put in some efforts to make the local VM solution work before requesting a cloud VM.
To request and access a cloud VM please follow the guide below.
⚠️ The cloud VMs will be decommissioned shortly after the deadline of the last (3rd) lab exercise of COMP60261 part 1 (we will take extensions into account). Please do not store anything important on them and back up your work regularly using version control tools such as Git.
Requesting a VM
To request a virtual machine complete this form (accessible only with a valid University of Manchester account):
https://forms.office.com/e/H6VC9uHbT5
The VM needs to be created manually, but you should hear back from us within ~24 hours. We will email you instructions to connect remotely to your VM using SSH, as well as the necessary credentials to do so. The body of the email will look like that:
Hi,

A VM has been created for you, you can connect to it as follows:

ssh <student-name>@uom.pierreolivier.eu -p <port>

Your username is: student-name
Your temporary password is: <temporary password here>

You will need to change your password upon your first connection, then re-connect.
Remote Connection: Command Line
To connect from the command line, bring up a terminal and type the command given above:
ssh <student-name>@uom.pierreolivier.eu -p <port>
Replace <student-name> and <port> with what you were given in the email.
Enter your temporary password to connect.
Upon connecting first you will be asked to change your password: choose a good one and remember it.
If you are familiar with command line editing tools (e.g. nano, vim), you can use these to complete the lab.
You can set up passwordless SSH connection by generating an SSH key for your local machine with
ssh-keygenif you don't already have one, then using (replace<port>by the port indicated in the email):ssh-copy-id uom.pierreolivier.eu -p <port>
Remote Connection: VSCode
Visual Studio Code is an IDE that you can run on your local machine and transparently connect remotely to the VM. It is quite practical for remote development. To set up VSCode to connect to the VM proceed as follows:
- Download and install VSCode for your system from here (it is available for Windows, Linux, and Mac).
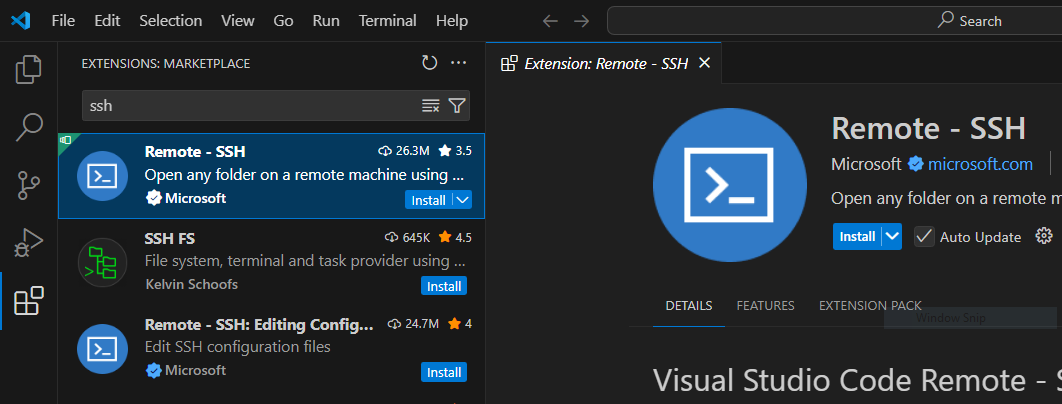
- In VSCode click on the extensions tab on the left, and search for the extension named Remote - SSH, then click on install to install it:
- Once the extension is installed, bring up the command palette, and select Remote-SSH: Add New SSH Host..., then enter the URL
uom.pierreolivier.eu:

- Next select the SSH configuration file to update. The first one in the list is generally the correct one. Once this is done a popup should appear in the bottom right corner, confirming that the host has been added. We still need to edit the host a bit, click on Open Config:

- Locate in the SSH configuration file the block that starts with
Host uom.pierreolivier.euand edit the file so that block looks like that (replace<student-name>and<port>with what was sent to you in the email following your VM request):
Host uom.pierreolivier.eu
    HostName uom.pierreolivier.eu
    User <student-name>
    Port <port>
- Save the SSH configuration file, and bring up the command palette again, this time selecting Remote-SSH: Connect to Host..., and select uom.pierreolivier.eu in the list. If VSCode asks you what system runs on the remote machine, select Linux. You will be then prompted for your password (the one you chose upon first connection to the VM).
At that stage the VSCode window is connected to the VM: you can open a workspace, explore the file system, create and edit files/folders, open terminals, etc., on the VM transparently, as if VSCode was running locally on it.
If you have set up passwordless SSH connection with a key, VSCode won't prompt for a password.
Any issue with the VM connection? Please come to the office hours or use the discussion boards.