Objectives and Logistics
Lab Presentation
The goal of this lab is to learn about and put in practice concepts about password-based authentication. We will cover good practices for building applications using password-based authentication, and how such authentication systems can be broken when these good practices are not followed. This lab is composed of 3 main exercises:
- Password Extraction: how reverse-engineering techniques can be used to extract hardcoded passwords from an application's binary.
- Hashed Passwords: how to build a proper authenticator storing hashed and salted passwords.
- Weak Password Cracking: how simple passwords (e.g. too short) can easily be cracked using modern computers.
Each exercise is divided into two parts: a guided part with detailed instructions on how to proceed, and an advanced part which is less guided. You can access each exercise from the left menu. In absolute exercises are independent of each other, but we strongly recommend doing them in order. If you are stuck in the advanced part of an exercise, it's OK to start the next one though.
⚠️ Ethical Use Disclaimer
Although part of this lab exercise introduces techniques that are commonly associated with offensive security, their purpose in this context is purely educational. Our goal is to help you understand how attackers operate, so you can build stronger, more secure systems.
You are expected to use the knowledge and skills from this lab responsibly and ethically. Any use of these techniques outside of authorised, educational, or professional penetration testing contexts is strictly prohibited and may be illegal.
Submission Instructions
The deliverables for this exercise are a series of passwords (for the password extraction and password cracking parts of the exercise) and some C source code (for the hashed password part of the exercise).
The submission is made through the CS Department’s Gitlab.
You should have under your account a repository named 60261-lab1-s-authentication_<your username>.
The passwords should be submitted in a CSV file, that should be pushed alongside the C source code on the main branch.
You can find an empty skeleton for such a file here.
Submission details are given in the relevant parts of this exercise.
To indicate that the submission is ready to be marked create a tag named lab1-submission.
The deadline for this assignment is Friday 17/10 2pm London time.
A few important points regarding the submission:
- ⚠️ Make sure you push to the precise repository mentioned above and not another one (do not fork it or create a new repo), and to tag your submission properly.
- ⚠️ The submission is to be made through GitLab only, there is no need to submit anything to Canvas.
- ⚠️ You need some basic knowledge of git and GitLab to submit that exercise. In the unlikely case you are not familiar with these tools, see some guidance here.
Failure to follow these instructions is likely to result in a mark of 0 for this exercise.
For any issues or questions, feel free to get in touch with the instructor through the discussion board on Canvas or during office hours (see the schedule on Canvas for the their time and location. You can also contact your student representatives.
High-Level Marking Scheme
| Part | Marks |
|---|---|
| 1.1 Password Extraction (Guided) | /4 |
| 1.2 Password Extraction (Advanced) | /3 |
| 2.1 Authenticator (Guided) | /4 |
| 2.2 Authenticator (Advanced) | /2 |
| 3.1 Password Cracking (Guided) | /4 |
| 3.2 Password Cracking (Advanced) | /3 |
| Total: | /20 |
Intended Learning Outcomes (ILOs)
By the end of this lab, students will be able to:
- Analyse and reverse-engineer compiled binaries to extract hardcoded credentials using static analysis tools and techniques.
- Design and implement secure authentication mechanisms that store user passwords using salted cryptographic hashes.
- Demonstrate the vulnerability of weak passwords by applying password cracking tools and techniques on weak passwords.
Required Setup
To complete this lab you need a Linux, Debian-based, x86-64 environment.
⚠️ You should not use any other environment (Windows/Mac): no support will be provided for these, and the differences in e.g. toolchains for these environments may lead to you being unable to complete the exercises and/or losing some/all of the marks.
In terms of Linux distribution we recommend Ubuntu 22.04 or Debian 12. To access such an environment you have several options:
Option 1: Lab Machines
The lab machines have x86-64 CPUs and an installation of the proper Linux distribution, and have most of the software required pre-installed. All the exercises for part 1 of the unit can be done on lab machines, however this option has the following downside:
- You need to be on campus i.e. you cannot make progress from home.
- You do not have administrator privileges: you will need to install a few tools manually for the exercises, but nothing that should require administrator privilege. Still, without administrator privileges the impossibility to disable ASLR will make some parts of the second lab (advanced stack smashing and advanced temporal safety) more difficult.
Option 2: Local x86-64 Virtual Machine
You can run a Linux distribution in a VM: the benefits of this approach are that you don't have to install Linux natively on your machine, and you can work at home. We provide a virtual disk image of a Debian 12 install that will be suitable for doing the exercises. To use it create a VM with e.g. Virtual Box and use the virtual disk provided as main storage media. You may need to fine-tune it (e.g. upgrade Virtual Box guest additions) after initialisation.
The VM should have at least 4 GB of RAM to complete the exercises.
It is an x86-64 image, so it will not work with native virtualisation tools on ARM-based MacBook laptops. For such recent MacBooks a solution seems to be UTM that emulates an x86-64 CPU. We have not tested it so if you try please consider reporting e.g. on the discussion boards about your success/failure.
comp60261-vm.qcow2for use with Linux Qemu/KVM hosts, as well as (hopefully) with UTM.comp60261-vm.vdifor use with VirtualBox. Create a new VM and specify a Debian OS and to use an existing disk. In the VM display settings also enable 3D acceleration. Upon first boot you may want to upgrade the VirtualBox guest additions.
The credentials to login in the VM are:
- username:
user - password:
a
Option 3: Local x86-64 Native Linux Install
If you have an x86-64 machine you can install Ubuntu 22.04 or Debian 12 natively. Select that option only if you know what you are doing: we will not provide support for the installation of Linux.
Option 4: Cloud VM (only if the other options are not possible)
If the lab machine/VM solutions are not suitable for you, as a last resort we can give you access to a cloud x86 VM. We have a limited number of resources for these, so make sure you put in some efforts to make the local VM solution work before requesting a cloud VM.
To request and access a cloud VM please follow the guide below.
⚠️ The cloud VMs will be decommissioned shortly after the deadline of the last (3rd) lab exercise of COMP60261 part 1 (we will take extensions into account). Please do not store anything important on them and back up your work regularly using version control tools such as Git.
Requesting a VM
To request a virtual machine complete this form (accessible only with a valid University of Manchester account):
https://forms.office.com/e/H6VC9uHbT5
The VM needs to be created manually, but you should hear back from us within ~24 hours. We will email you instructions to connect remotely to your VM using SSH, as well as the necessary credentials to do so. The body of the email will look like that:
Hi,

A VM has been created for you, you can connect to it as follows:

ssh <student-name>@uom.pierreolivier.eu -p <port>

Your username is: student-name
Your temporary password is: <temporary password here>

You will need to change your password upon your first connection, then re-connect.
Remote Connection: Command Line
To connect from the command line, bring up a terminal and type the command given above:
ssh <student-name>@uom.pierreolivier.eu -p <port>
Replace <student-name> and <port> with what you were given in the email.
Enter your temporary password to connect.
Upon connecting first you will be asked to change your password: choose a good one and remember it.
If you are familiar with command line editing tools (e.g. nano, vim), you can use these to complete the lab.
You can set up passwordless SSH connection by generating an SSH key for your local machine with
ssh-keygenif you don't already have one, then using (replace<port>by the port indicated in the email):ssh-copy-id uom.pierreolivier.eu -p <port>
Remote Connection: VSCode
Visual Studio Code is an IDE that you can run on your local machine and transparently connect remotely to the VM. It is quite practical for remote development. To set up VSCode to connect to the VM proceed as follows:
- Download and install VSCode for your system from here (it is available for Windows, Linux, and Mac).
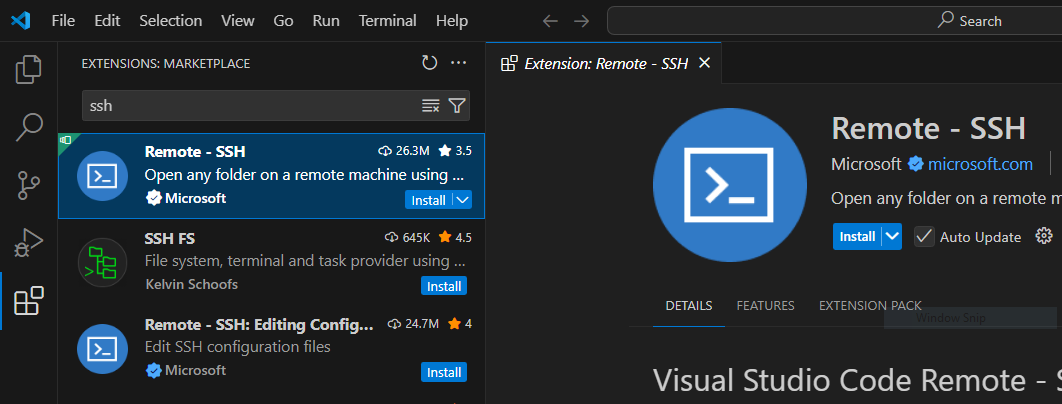
- In VSCode click on the extensions tab on the left, and search for the extension named Remote - SSH, then click on install to install it:
- Once the extension is installed, bring up the command palette, and select Remote-SSH: Add New SSH Host..., then enter the URL
uom.pierreolivier.eu:

- Next select the SSH configuration file to update. The first one in the list is generally the correct one. Once this is done a popup should appear in the bottom right corner, confirming that the host has been added. We still need to edit the host a bit, click on Open Config:

- Locate in the SSH configuration file the block that starts with
Host uom.pierreolivier.euand edit the file so that block looks like that (replace<student-name>and<port>with what was sent to you in the email following your VM request):
Host uom.pierreolivier.eu
    HostName uom.pierreolivier.eu
    User <student-name>
    Port <port>
- Save the SSH configuration file, and bring up the command palette again, this time selecting Remote-SSH: Connect to Host..., and select uom.pierreolivier.eu in the list. If VSCode asks you what system runs on the remote machine, select Linux. You will be then prompted for your password (the one you chose upon first connection to the VM).
At that stage the VSCode window is connected to the VM: you can open a workspace, explore the file system, create and edit files/folders, open terminals, etc., on the VM transparently, as if VSCode was running locally on it.
If you have set up passwordless SSH connection with a key, VSCode won't prompt for a password.
Any issue with the VM connection? Please come to the office hours or use the discussion boards.
Password Extraction: Guided Example
In this exercise you will be given an x86-64 binary which results from the compilation of a C program. This binary prompts for a password to authenticate the proper user. The correct password has been hardcoded into the binary, and you do not have access to the source code. Hardcoding passwords is not a secure coding practice, and the goal of the exercise is to extract the password from this binary using reverse-engineering to demonstrate that.
This first example will guide you through decompiling the program, exploring its machine code, running it step by step in a debugger, and extracting the password.
Part of this exercise has been inspired by Georgia Tech's CS6265 Information Security Lab.
Downloading and Running the Binary
Download this binary. You will likely need to give it executable permissions:
chmod +x crackme01
Execute the binary and input something when prompted for the password:
Please input your password:
test
Wrong password.
⚠️ The binaries to reverse engineer in this exercise are different for each student. Make sure to download them using the link provided above and do not work on the binaries downloaded by another student.
As we don't have access to the source code, our goal here will be to inspect the binary's machine code and its behaviour at runtime to extract to the password.
Inspecting the Binary's Sections with objdump
objdump is a command-line tool used for executable and object files, among others.
It is part of the GNU Binutils package and is commonly used in reverse engineering, debugging, and binary analysis.
We can use it to obtain some general information about the binary:
objdump -f crackme01

crackme01:     file format elf64-x86-64
architecture: i386:x86-64, flags 0x00000150:
HAS_SYMS, DYNAMIC, D_PAGED
start address 0x0000000000001070
The tool reports that the binary is an ELF executable, compiled for the Intel x86-64 architecture.
It also shows that the code supposed to be executed first after the program is loaded, i.e. the program entry point, is at address 0x1070.
We can list the ELF sections present in the binary as follows:
objdump -h crackme01

crackme01:     file format elf64-x86-64

Sections:
Idx Name          Size      VMA               LMA               File off  Algn
  0 .interp       0000001c  0000000000000318  0000000000000318  00000318  2**0
                  CONTENTS, ALLOC, LOAD, READONLY, DATA
  1 .note.gnu.property 00000020  0000000000000338  0000000000000338  00000338  2**3
                  CONTENTS, ALLOC, LOAD, READONLY, DATA
# ...
 11 .init         00000017  0000000000001000  0000000000001000  00001000  2**2
                  CONTENTS, ALLOC, LOAD, READONLY, CODE
 12 .plt          00000040  0000000000001020  0000000000001020  00001020  2**4
                  CONTENTS, ALLOC, LOAD, READONLY, CODE
 13 .plt.got      00000008  0000000000001060  0000000000001060  00001060  2**3
                  CONTENTS, ALLOC, LOAD, READONLY, CODE
 14 .text         00000159  0000000000001070  0000000000001070  00001070  2**4
                  CONTENTS, ALLOC, LOAD, READONLY, CODE
# ...
Each section as an id (Idx) and a name (Name).
As a convention the names of section start with a ..
The VMA field indicates where this section will be mapped in memory by the loader when the program executes.
The mapping will be done from within the binary itself at location File off, for a size equal to Size.
That loading process is illustrated below (from a single section point of view):

Sections have attributes, written in capital letters in objdump's output.
The interesting ones here are:
DATA: indicates that this section contains data that will be mapped with read-write or read-only permissions in the address space at load time.CODE: indicates that this section contains executable code that will be mapped with executable and read-only permissions in the address space at load time.
Remember that we want to inspect the machine code of this program to try to reverse-engineer its behaviour and find the password, so we'll look at the CODE sections.
They are as follows:
.initand.finiare the initialisation and finalisation section, they contain code that runs before the main program starts (.init) and right before it exits (.fini). They are used for implementing things like C++ global constructors and destructors..plt.gotand.pltare the global offset table and the procedure linkage table, two mechanisms helping for dynamic linking. If you want to learn more about these (not needed for this exercise) read this..text: the main code section, that contain the program's code (e.g. themainfunction). This is what we are interested in here.
Disassembling the Binary's code with objdump
We can disassemble the main code of the program, i.e. the .text section, to see the machine code it contains as follows:
objdump --disassemble -j .text crackme01
objdump will proceed to print the disassembled machine code of .text.
This exercise requires a very basic understanding of x86-64 assembly. Please refer to this reference sheet for a short list of the main x86-64 instructions as well as general and special purpose registers.
With this binary objdump is able to identify the machine code corresponding to each function present in the source code that was compiled to produce this binary.
We see the machine code for a bunch of functions automatically added by the C library (_start, register_tm_clones, deregister_tm_clones, __do_global_dtors_aux, and frame_dummy), as well as for the main function, which is what we are interested in here:
0000000000001159 <main>:
    1159:	55                   	push   %rbp
    115a:	48 89 e5             	mov    %rsp,%rbp
    115d:	48 83 c4 80          	add    $0xffffffffffffff80,%rsp
    1161:	48 8d 05 9c 0e 00 00 	lea    0xe9c(%rip),%rax        # 2004 <_IO_stdin_used+0x4>
    1168:	48 89 c7             	mov    %rax,%rdi
    116b:	e8 c0 fe ff ff       	call   1030 <puts@plt>
    1170:	48 8b 15 c9 2e 00 00 	mov    0x2ec9(%rip),%rdx        # 4040 <stdin@GLIBC_2.2.5>
    1177:	48 8d 45 80          	lea    -0x80(%rbp),%rax
    117b:	be 80 00 00 00       	mov    $0x80,%esi
    1180:	48 89 c7             	mov    %rax,%rdi
    1183:	e8 b8 fe ff ff       	call   1040 <fgets@plt>
    1188:	48 8d 45 80          	lea    -0x80(%rbp),%rax
    118c:	48 8d 15 95 2e 00 00 	lea    0x2e95(%rip),%rdx        # 4028 <__dso_handle+0x8>
    1193:	48 89 d6             	mov    %rdx,%rsi
    1196:	48 89 c7             	mov    %rax,%rdi
    1199:	e8 b2 fe ff ff       	call   1050 <strcmp@plt>
    119e:	85 c0                	test   %eax,%eax
    11a0:	75 11                	jne    11b3 <main+0x5a>
    11a2:	48 8d 05 78 0e 00 00 	lea    0xe78(%rip),%rax        # 2021 <_IO_stdin_used+0x21>
    11a9:	48 89 c7             	mov    %rax,%rdi
    11ac:	e8 7f fe ff ff       	call   1030 <puts@plt>
    11b1:	eb 0f                	jmp    11c2 <main+0x69>
    11b3:	48 8d 05 82 0e 00 00 	lea    0xe82(%rip),%rax        # 203c <_IO_stdin_used+0x3c>
    11ba:	48 89 c7             	mov    %rax,%rdi
    11bd:	e8 6e fe ff ff       	call   1030 <puts@plt>
    11c2:	b8 00 00 00 00       	mov    $0x0,%eax
    11c7:	c9                   	leave
    11c8:	c3                   	ret
Pay attention to the call instructions, which implement the function calls present in the original source code.
These are calls to functions from the C standard library.
We have, in order:
- A call to
puts, used by the C library to print something on the command line. This is likely the result of aprintfin the original source code, used to printPlease input your password:when the program is executed. - A call to
fgets, used to get a string from the console: that is likely the way the program gets the password attempt from the user. - A call to
strcmp, which performs string comparison: that is probably how the password attempt is compared to the correct password.
strcmp takes two parameters, that are pointers to the strings to compare.
We know that one of these strings is the password attempt, and the other is the correct password.
The next step is to run the program step by step in a debugger and observe the values pointed by these pointers at runtime to find the password.
Debugging the Program with GDB
Here we will use GDB Enhanced Features, a series of enhancements to GDB that significantly ease the runtime exploration of a program's behaviour. To install it, type the following in a terminal:
bash -c "$(curl -fsSL https://gef.blah.cat/sh)"
Once GEF is installed, load the program with GDB:
gdb crackme01
A reference sheet with the main GDB commands is available here.
Within GDB, set a breakpoint on the function main:
gef> br main
Breakpoint 1 at 0x115d
After the breakpoint is set, run the program until execution hits the breakpoint:
run
Once the breakpoint is hit, GDB/GEF will display a bunch of information about the program's state of execution. Locate the following:
- Registers values:
$rax,$rbx, etc. - Stack content, with the top of the stack pointed by the stack pointer
$rbp. - Disassembled machine code, with the next instruction to execute pointed by the green arrow (its address is pointed by the instruction pointer
$rip).
At that stage we need to let the program continue its execution step by step, i.e. machine instruction by machine instruction.
This is done with the ni command.
Use it repeatedly until the program prompt you for the password, and enter something easily recognisable, e.g. xxxxx.
Next continue the execution step by step until you hit the call to strcmp.
GDB/GEF should detect that this is a function call.
It is aware of the calling convention (first parameter in $rsi, second parameter in $rdi, etc.) and gives you a list of value for the parameters:
strcmp@plt (
   $rdi = 0x00007fffffffd990 → 0x00000a7878787878 ("xxxxx\n"?),
   $rsi = 0x0000555555558028 → "password-here",
   ...
)
The first parameter in $rdi is the password attempt we just entered.
The second one in $rsi is what we are looking for, it's the correct value for the password!
Note that it will have a different value for your version of the binary.
Try it out outside GDB by running the program normally:
Please input your password:
password-here
Authentication successful!
Submission Instructions
Input the password extracted on the corresponding line of the CSV file in the submission git repository, i.e.:
crackme01,password-here
Password Extraction: Advanced Binaries
Following up on the previous, guided exercise, you will be given here a series of binaries performing a check against a correct password which value is hardcoded within the program in some form. Your goal is again to reverse-engineer the program's behaviour and extract the correct password. The binaries are:
⚠️ Once again these binaries are generated on a per-student basis, do not work on binaries downloaded by another student.
These binaries differ from the guided example we have seen previously in various ways:
- The correct password may not be stored anymore using a string type.
- The metadata present in the binary helpful for disassembly (e.g. metadata helping to separate disassembled machine code on a per-function basis) may be missing.
- The correct password may be generated at runtime rather than being present in static memory.
- The password check may be done outside of the source code's
mainfunction.
Use objdump and GDB to investigate the machine code and runtime behaviour of each of these programs, and extract the correct passwords.
For some binaries you may find this challenging: please read the following to learn more about at tool that can help.
Decompiling with RetDec
RetDec is a decompiler: it disassembles a binary similarly to objdump, and then attempts to recover the C source code that was compiled into the considered binary.
The decompiled C source code will not look exactly the same as the original code, for various reasons:
- A lot of source level information is lost at compile time: variables and function names, comments, code formatting, type information, inlined/dead code, etc.
- Decompiling is not an exact science, and certain steps of the process (such as recovering the program's control flow graph at the machine code level) need to rely on heuristic that may produce invalid results.
Still, attempting to get a source-level view of the program, even if incomplete, can be invaluable for reverse-engineering its behaviour.
Downloading and Installing RetDec
Let's first create a folder in the VM to install RetDec in:
mkdir -p ~/Software/RetDec
cd ~/Software/RetDec
We can then download a release from RetDec's GitHub repository, uncompress the archive and then delete it as it's no longer needed:
wget https://github.com/avast/retdec/releases/download/v5.0/RetDec-v5.0-Linux-Release.tar.xz
tar xf RetDec-v5.0-Linux-Release.tar.xz
rm RetDec-v5.0-Linux-Release.tar.xz
Decompiling a Binary
The decompilation tool of RetDec is bin/retdec-decompiler.
To use it simply pass the binary to analyse as parameter:
~/Software/RetDec/bin/retdec-decompiler crackme02
After the analysis is done, a C source file (in this example crackme02.c) should have been created in the local folder.
This is the result of the decompilation process, open it in an editor and explore the recovered source code to attempt to extract the password.
Proceed similarly for crackme03-06.
Submission
Input the extracted passwords in the corresponding lines of the CSV file in the submission git repository, i.e.:
crackme02,password-for-crackme02-here
crackme03,password-for-crackme03-here
crackme04,password-for-crackme04-here
crackme05,password-for-crackme05-here
crackme06,password-for-crackme06-here
Password Hashing: Basic crypt Usage
We have seen in the previous part of the exercise that hardcoding passwords in plain text in a program is a bad idea. More generally, storing passwords anywhere in clear should be avoided at all cost: if an attacker manage to get read access to the passwords (e.g. through reverse engineering or leaking database content -- something that happens quite often), it's basically game over.
Password Hashing
Storing hashed passwords addresses the aforementioned issue. The idea is as follows: when the password is created, it is not directly stored in plain text in the program or database. Instead, a hash function, such as MD5, SHA-256, etc., is applied on the password, and it is the resulting hash that is stored:

The hash function is made in such a way that, even if what's stored (the hash) becomes accessible to an attacker, it is very hard to revert the hash into the original password. Here, very hard is defined as difficult in terms of computational time. In the third and last part of the exercise, we'll attempt to revert hashes into their original password values, and we'll see that with properly defined passwords it is not feasible.
Hashing only the password is not a good security practice, because an attacker can easily use pre-computed databases of hashes and corresponding passwords (rainbow tables) to crack the password. To avoid that problem, upon creation each password is slightly modified before being hashed: a random value is added (e.g. concatenated) to the password, and that value is different for each password created. That value is called a salt, and will be stored (in clear) alongside the hash value, to be later retrieved for authentication:

crypt(3)
crypt, also called crypt(3) to avoid confusion with an unrelated tool, is a C function used to compute the hash of a password attempt entered by a user.
It can be used to create password, but also for authentication, to compute the hash of a password attempt, which can then be compared to the correct password's hash to authenticate the user.
The function's prototype is as follows:
char *crypt(const char *key, const char *salt);
The first parameter key is a string representing the password/password attempt for which we want to compute the hash.
The second parameter salt is another string that indicate 1) the hash function to use and 2) the salt to combine to the password to produce the final hash.
The format for salt is: $<hash function identifier>$<salt>.
You can find a list of identifiers here, e.g. use 1 for MD5 or 6 for SHA-512.
Using crypt(3) to Build a Basic Authenticator
This is the skeleton for our basic authenticator:
#include <stdio.h>
#include <string.h>
#include <unistd.h>
#include <crypt.h>  // needed to use crypt()

#define PASSWORD_HASH // TODO complete here with the correct password in the
                      // format expected by crypt:
                      // <hash function id>$<salt>$<hash of the correct password>

int main() {
    char attempt[100];
    char *hashed_attempt;

    printf("Please input your password: \n");
    char *r = fgets(attempt, sizeof(attempt), stdin);
    if(!r)
        return -1; // problem with fgets

    // remove the carriage return character from the attempt string
    attempt[strcspn(attempt, "\n")] = 0;

    // TODO complete here:
    // 1. Call crypt to compute the password attempt hash
    // 2. Call strcmp to compare it to the ground truth (PASSWORD_HASH)
    // 3. Use printf to print "Authentication successful!\n" if the correct
    //    password was entered, or "Wrong password.\n" if not

    return 0;
}
Copy-paste this code in a C file and complete the two locations marked as TODOs.
An easy way to generate the correct value for PASSWORD_HASH is to use the mkpasswd tool (install it with sudo apt install whois).
For example, to generate the hash string for a password value of password, using SHA-512 and a salt value of saltsalt:
mkpasswd --method=SHA-512 --salt=saltsalt password
$6$saltsalt$qFmFH.bQmmtXzyBY0s9v7Oicd2z4XSIecDzlB5KiA2/jctKu9YterLp8wwnSq.qc.eoxqOmSuNp2xS0ktL3nh/
To compile the authenticator, make sure to link against libcrypt as follows:
gcc authenticator.c -o authenticator -lcrypt
Before submitting your code, please set the value of PASSWORD_HASH so that the password is your University username (not the numeric ID), the salt is saltsalt, and the hash method is SHA-512.
Submission
Add and push your completed authenticator's source code as a single file named authenticator.c to the submission git repository.
Advanced Authentication
Here you will be tasked with enhancing the basic authenticator developed in the previous part of the lab exercise. You'll address 2 limitations:
- The password attempt is visible when entered on the standard output, which is insecure
- The authenticator cannot handle multiple users, and the correct password is hardcoded in the program's binary
Hiding the Password Attempt Input
Having the console display what is typed when a password attempt is input is obviously not secure: someone could be taking picture/filming/peeking over the shoulder of the user attempting to authenticate.
An old way to input a password attempt without having it displayed on the console is getpass.
However, as its manual page indicate, it is depreciated and should not be used.
The manual page indicates that termios, a set of functions controlling terminal attributes, should rather be used.
Implement two functions named disable_echo and enable_echo, that respectively enable and disable the display of characters on the command line.
They should both make use of the functions tcgetattr and tcsetattr provided by termios.
These functions take no parameter and return void.
They should be used in the main function of the authenticator program as follows:
  printf("Please input your password: \n");

  disable_echo();
  fgets(input, sizeof(input), stdin);
  enable_echo();
For some hints on how to implement these two functions, see this StackOverflow post.
Storing User IDs and Passwords in a File
Hardcoding passwords in the binary, even if they are hashed and salted, is not particularly secure. Enhance the authenticator so that it reads the correct passwords from a file on disk. This database of correct password should also store associated usernames, using the following format:
<username>:<hash function ID>$<salt>$<hash value>
The enhanced version our authenticator should now take two command line parameters:
./authenticator <path to correct password file> <username to authenticate>
To test your code you can download an example of database file here.
This database contains 5 users with the following passwords (hashed with 500000 rounds of SHA-512 with salt saltsalt1 ot saltsalt5):
| Username | Password |
|---|---|
| user1 | password1 |
| user2 | password2 |
| user3 | password3 |
| user4 | password4 |
| user5 | password5 |
A couple of hints about how to proceed:
- Use
fopen/fcloseandfgetsto open/close and read the password database file line by line. - Use
strtokto extract the username and the password hash (separated by:).
If you have access to a Linux installation where you have root permissions, you can check out the file holding the hashes for the different users on the computer with the following command (you'll see that the format is quite similar to that of our enhanced authenticator):
cat /etc/shadow
Submission
Add and push your advanced authenticator's source code as a single file named authenticator-advanced.c to the submission git repository.
Basic Cracking
We've seen in the last part of the exercise that passwords cannot be stored in plain text but rather as hashes. Here we assume a scenario in which an attacker manages to get their hands on a list of hashed passwords, e.g. through a data breach. The attacker will then want to revert hashes into the original passwords: this is called cracking the passwords.
Here we are going to see a couple of guided examples for two password cracking techniques: the dictionary and the bruteforce attacks.
Dictionary Attack
The dictionary attack consists in using a database of existing words that could be used as passwords, and hashing them all with the hope to find a hash that matches the one we try to crack.
Our goal here is going to revert the following MD5 hash into the original password:
For the dictionary attack we also need a list of words to hash. For that we can download a list of words known to have been used as passwords:
wget https://olivierpierre.github.io/comp60261/lab1/include/dictionary.txt
You can open and explore dictionary.txt: it contains the list, with one word per line.
The file contains 10K passwords, we'll see that with the power of today's computers, with weak passwords/hashing techniques, it can be actually quite fast for an attacker to try every word in that list.
To perform the dictionary attack and the list of words dictionary.txt, we'll use a tool named hashcat.
If hashcat is not already installed on your machine you can do so as follows:
mkdir -p ~/Software
wget https://hashcat.net/files/hashcat-7.1.1.7z -O ~/Software/hashcat-7.1.1.7z
cd ~/Software && p7zip -d hashcat-7.1.1.7z
echo "alias hashcat=~/Software/hashcat-7.1.1/hashcat.bin" >>  ~/.bashrc
source ~/.bashrc
Adapt these steps to your environment (e.g. you may use a different shell).
To start the cracking process with hashcat, proceed as follows:
hashcat -m 0 -a 0 -o cracked.txt basichash01.txt dictionary.txt
The parameters passed are:
-m 0indicates the type of hash is cracked, here we use0for MD5 (see thehashcatman page/wiki for the list of hashes supported and their ID)-a 0indicates the type of attack performed, here0refers to the dictionary attack. To see the other types check outhashcat's man page or wiki.-o cracked.txtis the output file wherehashcatwill write the password value if found.basichash01.txtcontains the hash to crack.dictionary.txtis our dictionary.
Here the process should be relatively quick, and after hashcat returns you should find the password in the output file.
Checking the Correctness of Cracked Passwords
To check that you have cracked the correct passwords, go to this website: https://comp60261.uom.pierreolivier.eu.
Locate the item corresponding to the hash we focused on here, basichash01, and enter the password in the text field. A green check mark ✅ will confirm you have the right password, e.g.:

If you entered the wrong password you will rather see a red cross ❌. This website can be used to download all binaries/hashes, and verify the correctness of all passwords extracted/cracked in this exercise.
Bruteforce Attack
The bruteforce attack is one of the simplest and most exhaustive methods used for password cracking. In this approach, an attacker attempts to guess the correct password by systematically trying every possible combination of characters until the correct one is found. Because the search space explodes quickly with medium to long passwords, this method is only useful for cracking weak passwords, i.e. passwords with a small number of not-so-diverse characters (e.g. only lowercase letters).
Here we will attempt to crack the following MD5 hash:
hashcat can also be used for bruteforce attack:
hashcat -m 0 -a 3 -o cracked.txt basichash02.txt "?a?a?a?a?a"
The parameter passed are:
-m 0: MD5 hash.-a 3: bruteforce attack.-o cracked.txt: output file.basichash02.txtthe hash to crack.- The last parameter
"?a?a?a?a?a"defines the key space to explore. Here we use the token?arepeated 5 times to instructhashcatto explore words made of combinations of 5 characters.
Here again, hashcat should return quickly with the cracked password present in cracked.txt.
Make sure to verify you have the right password for basichash02 here.
Lesson Learned: Strong Passwords
The ease with which we cracked these two simple passwords allows us to understand some of the modern recommendations for setting strong passwords:
- Length: to protect against bruteforce attacks, the password should not be too short: the longer, the better. This increases the size of the key space and makes bruteforce attacks exponentially more costly in time.
- Complexity: to protect also against bruteforce attacks, the password should contain different types of characters: uppercase and lowercase letters, numbers, as well as symbols. This also increases the size of the key space.
- Unpredictability: don't use dictionary words, names, dates, personal information, or obvious patterns, to protect against dictionary attacks.
To confirm this, generate the MD5 hash of a strong password, verifies that it is not present in dictionary.txt (i.e. dictionary attack based on that database cannot succeed) and launch a bruteforce attack:
echo -n "Fwu23#Xwp>" | md5sum
01e5f04a5dd8fce05c6f553af94bf746  -

echo "01e5f04a5dd8fce05c6f553af94bf746" > hash3.txt

hashcat -m 0 -a 3 -o cracked.txt hash3.txt "?a?a?a?a?a?a?a?a?a"
After hashcat starts running wait a few seconds then press Enter, and the software should report about its progress and estimated time left.
It should be somewhere around 300+ years.
Press q to exit the search process.
Submission
Fill in the corresponding lines in the CSV file on the submission git repository, i.e.:
basichash01,password-for-basichash01-here
basichash02,password-for-basichash02-here
Advanced Cracking
Here you will be given a series of hashes, with the goal of cracking the corresponding passwords. This time you won't be guided, however with each hash you will be given some hints about how to crack it.
⚠️ Each of the passwords you aim to find here is supposed to be cracked swiftly by
hashcat. Please monitorhashcat's output regularly (press Enter while it runs): if the estimated completion time (Time.Estimated) is higher than one minute, you should conclude that you are not using the right strategy and stop the search process to find a better one. If you fail to do so you would simply hog resources on the host for nothing, and we may need to kill your VM.
Make sure to check the correctness of each cracked password here.
Advanced Hash #1
Hints:
- This is a long password (10+ characters with various symbols) so bruteforce won't work
- The hashing method used is MD5
- The password has been salted before hashing: what was hashed was the concatenation of the password + the salt. For example, with a password "password" and a salt "salt", the string "passwordsalt" was hashed.
- The salt used is "salt", and the string given above has the format
<hash>:<salt>. This is the format accepted byhashcatfor salted MD5 hashes. Search for the relevant hash mode here.
Advanced Hash #2
Hints:
- The hashing method used is MD5
- The password is not in a dictionary
- This password is made of 8 characters: bruteforcing them as any possible character (
?awithhashcat) in the VM would take years. However, an additional precision is that the password is made only of digits. See the built-in character sets supported byhashcathere.
Advanced Hash #3
Hints:
- Hashing method used is SHA-1.
- Salted with
saltby concatenation of the salt and password. Search for the relevant hash mode here. - Long password, but its value is in the dictionary.
Advanced Hash #4
Hints:
- Hashing method used is SHA2-256
Advanced Hash #5
Hints:
- Good luck!
Submission
Input the cracked passwords in the corresponding lines of the CSV file in the git repository, i.e.:
advancedhash01,password-for-advancedhash01-here
advancedhash02,password-for-advancedhash02-here
advancedhash03,password-for-advancedhash03-here
advancedhash04,password-for-advancedhash04-here
advancedhash05,password-for-advancedhash05-here